
How to Connect Brother Printer to Wifi Without Cable: Easy Steps
To connect a Brother printer to Wi-Fi without a cable, use the printer's control panel to access the network settings. Follow the on-screen instructions to connect to your Wi-Fi network.
Setting up a Brother printer for wireless printing is essential for convenience and efficiency in a modern home or office. Wireless connectivity allows you to print from multiple devices without dealing with tangled cables. This setup can be done easily through the printer's control panel, which guides you step-by-step.
Ensure your Wi-Fi network is active and within range of the printer. Knowing how to connect your printer to Wi-Fi without a cable can save time and streamline your printing tasks. It is a straightforward process that enhances your overall printing experience.

Credit: support.brother.com
Preparation
Connecting your Brother printer to WiFi without a cable involves some preparation. This ensures a seamless and efficient setup process. Follow these steps to get ready.
Check Printer Compatibility
First, ensure your Brother printer supports wireless connectivity. Look for WiFi symbols or check the manual. Wireless-ready printers will have a network or WiFi option in the menu.
Gather Required Information
Before starting, gather the necessary information. You will need your WiFi network name (SSID) and password. Write them down to avoid mistakes during setup.
| Information | Details |
|---|---|
| SSID | Your WiFi network name |
| Password | Your WiFi password |
Ensure your router is on and working. Keep your printer close to the router for a strong signal. This helps avoid connectivity issues during setup.
Connecting Printer To Wifi
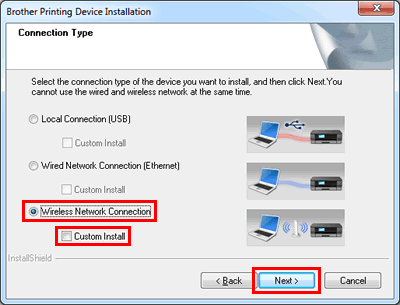
Connecting your Brother printer to WiFi without a cable is simple. You can connect it using the control panel or the WPS button. Both methods are quick and easy.
Follow these steps to connect your Brother printer to WiFi using the control panel:
- Turn on your Brother printer.
- Press the Menu button on the printer.
- Navigate to Network settings using the arrow keys.
- Select WLAN and press OK.
- Choose Setup Wizard and press OK.
- When prompted, select your WiFi network.
- Enter your WiFi password and press OK.
- Wait for the printer to connect. A confirmation message will appear.
If your router supports WPS, you can connect your Brother printer using the WPS button:
- Turn on your Brother printer.
- Press the WPS button on your router.
- Press the WPS button on your printer within two minutes.
- Wait for the connection to be established. A confirmation message will appear.
The table below summarizes the steps for each method:
| Method | Steps |
|---|---|
| Control Panel |
|
| WPS Button |
|
Using Control Panel
Connecting your Brother printer to WiFi without a cable is easy. The control panel is the best way to do this. Follow these simple steps to get your printer online. This guide will help you access WiFi settings, select your network, and enter the password.
Accessing Wifi Settings
First, turn on your Brother printer. Next, find the Menu button on the control panel. Press it to enter the main menu. Use the arrow keys to navigate. Select Network from the list of options. Press OK to confirm.
Selecting Network
Once in the Network menu, choose WLAN. Press OK to proceed. Select Setup Wizard from the WLAN options. The printer will search for available networks. A list of networks will appear on the screen.
Entering Password
Find your network name from the list. Select it by pressing OK. You will be prompted to enter the WiFi password. Use the keypad to type in the password. Press OK after entering the password. The printer will connect to the WiFi network.
If the connection is successful, a confirmation message will appear. Your Brother printer is now connected to WiFi without a cable.
Using Wps Button
Connecting your Brother Printer to WiFi without a cable is easy with the WPS button. This method is quick and doesn't require any technical expertise. You'll have your printer connected to the network in no time.
Locating Wps Button
The first step involves finding the WPS button on your router. Most routers have this button either on the front or back panel. It is often labeled as "WPS" or represented by an icon that looks like two arrows forming a circle.
If you can't find it, refer to your router's manual. The manual will show the exact location of the WPS button. Once located, you are ready for the next step.
Activating Wps On Printer
Next, you need to activate WPS on your Brother Printer. Start by turning on your printer. Go to the control panel on the printer and press the Menu button.
Navigate to the "Network" settings. Use the arrow keys to scroll and find the "WLAN" option. Select "WPS w/ Pin Code" or "WPS w/ Push Button". This depends on your printer model.
Connecting To Router
Once WPS is activated on your printer, it's time to connect to the router. Press the WPS button on your router. You have a two-minute window to complete this step.
While the router's WPS is active, go back to your printer and confirm the WPS connection. Your printer will start searching for the network. It will automatically connect to the router.
| Step | Action |
|---|---|
| 1 | Locate WPS button on the router |
| 2 | Activate WPS on the printer |
| 3 | Press WPS button on the router |
| 4 | Confirm connection on the printer |
After following these steps, your Brother Printer should be connected to your WiFi network. If the connection fails, repeat the steps.
Troubleshooting
Connecting your Brother printer to WiFi without a cable can sometimes be tricky. Common issues may arise, and resetting network settings can help. This troubleshooting guide will assist you in resolving these problems efficiently.
Common Issues
There are several common issues that might prevent your Brother printer from connecting to WiFi. Identifying these problems early can save you time and frustration.
- Incorrect WiFi password: Ensure you enter the correct WiFi password.
- Weak WiFi signal: Place the printer closer to the router.
- Network interference: Other devices may interfere with the signal.
- Outdated firmware: Update your printer’s firmware regularly.
If these common issues do not help, consider resetting your network settings. This can often resolve connectivity problems.
Resetting Network Settings
Resetting your Brother printer's network settings can resolve many connectivity issues. Follow these steps to reset your printer's network settings:
- Press the Menu button on your Brother printer.
- Select Network settings using the arrow keys.
- Choose Network Reset and press OK.
- Confirm the reset by selecting Yes.
- Wait for the printer to restart.
After resetting the network settings, you will need to reconnect the printer to your WiFi network. This process should now be smoother and more reliable.
| Step | Action |
|---|---|
| 1 | Press Menu |
| 2 | Select Network |
| 3 | Choose Network Reset |
| 4 | Confirm with Yes |
| 5 | Wait for restart |
If these steps do not resolve your issue, consider contacting Brother support for further assistance. They can provide additional troubleshooting tips and solutions.
Credit: support.brother.com
Testing Connection
Once you’ve connected your Brother printer to WiFi without a cable, the next step is to ensure that the connection is working properly. You can do this by running a few simple tests. These tests will help confirm that your printer is ready for use.
Printing Test Page
To start, you need to print a test page. This will help you check if the printer is connected to the WiFi network. Follow these steps to print a test page:
- Go to your printer’s control panel.
- Select the Settings or Menu option.
- Navigate to Print Reports or Print Test Page.
- Press OK to print a test page.
Check if the test page prints correctly. If it does, your printer is likely connected.
Confirming Successful Connection
After printing the test page, you need to confirm the connection. This step ensures that your printer is fully integrated into your network.
Follow these steps:
- Go to the Network section in your printer’s settings.
- Select WiFi Status or Network Status.
- Check the connection status. It should say Connected.
If the status shows Connected, your printer is successfully connected to WiFi. You can now print wirelessly.
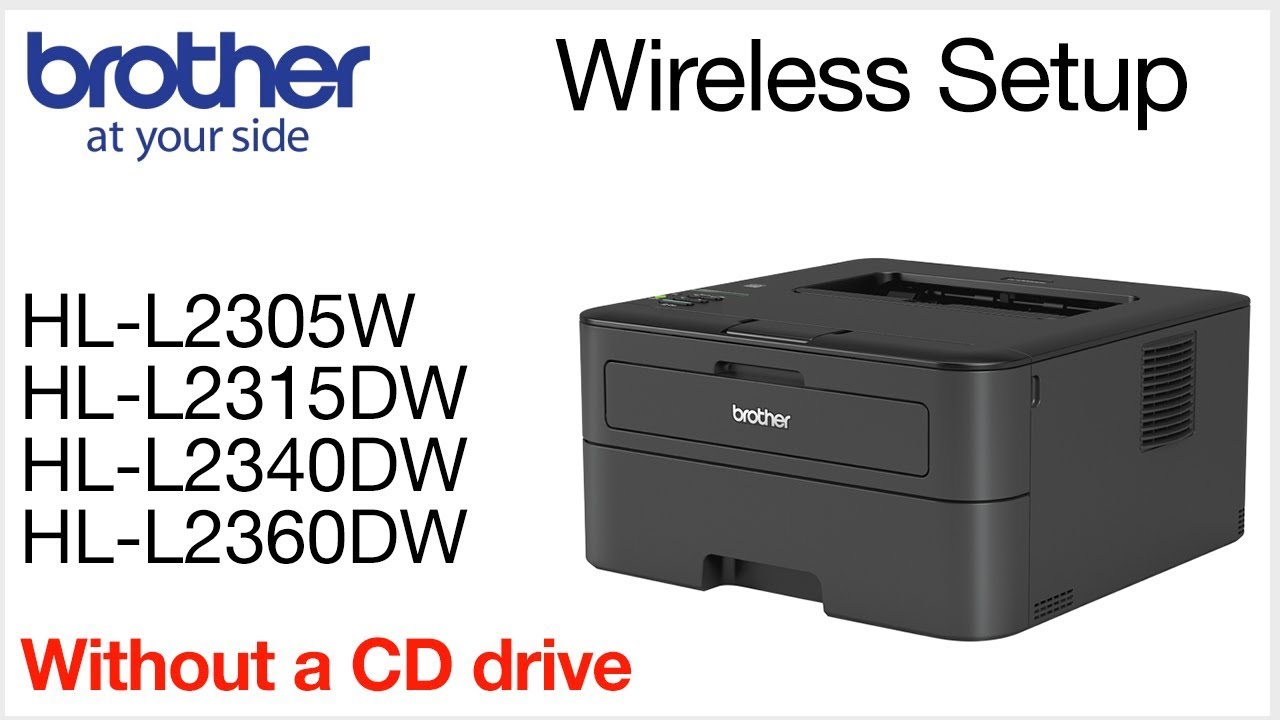
Credit: www.youtube.com
Frequently Asked Questions
How Do I Connect My Brother Printer To Wi-fi Without The Cord?
To connect your Brother printer to Wi-Fi without a cord, use the printer’s control panel. Select Network, then WLAN, and follow the setup wizard. Enter your Wi-Fi password when prompted.
How To Connect To A Brother Printer Wirelessly?
To connect a Brother printer wirelessly, press the Wi-Fi button on the printer. Select your network and enter the password. Install the Brother printer software on your computer. Follow on-screen instructions to complete setup. Ensure both printer and computer are on the same network.
How Do I Connect My Printer To Wi-fi Without Cable?
To connect your printer to Wi-Fi without a cable, access the printer's menu. Select Wi-Fi setup and follow on-screen instructions. Ensure your router's SSID and password are handy. Complete the setup to connect.
How Do I Manually Connect My Printer To Wi-fi?
To manually connect your printer to Wi-Fi, access the printer's settings menu. Select "Wi-Fi Setup" or "Network Settings. " Choose your Wi-Fi network, enter the password, and confirm.
Conclusion
Connecting your Brother printer to WiFi without a cable is straightforward. Follow the steps carefully for a smooth setup. Enjoy wireless printing with ease. This guide ensures you stay connected and productive. Feel free to share your experience in the comments below.
Happy printing!


